Fields & Signing#
The editor is where an agreement comes together: you add the document, set up your signers, drag fields onto the page, and send it out. Signers then complete a guided ceremony, and the finished document is flattened into a signed PDF.
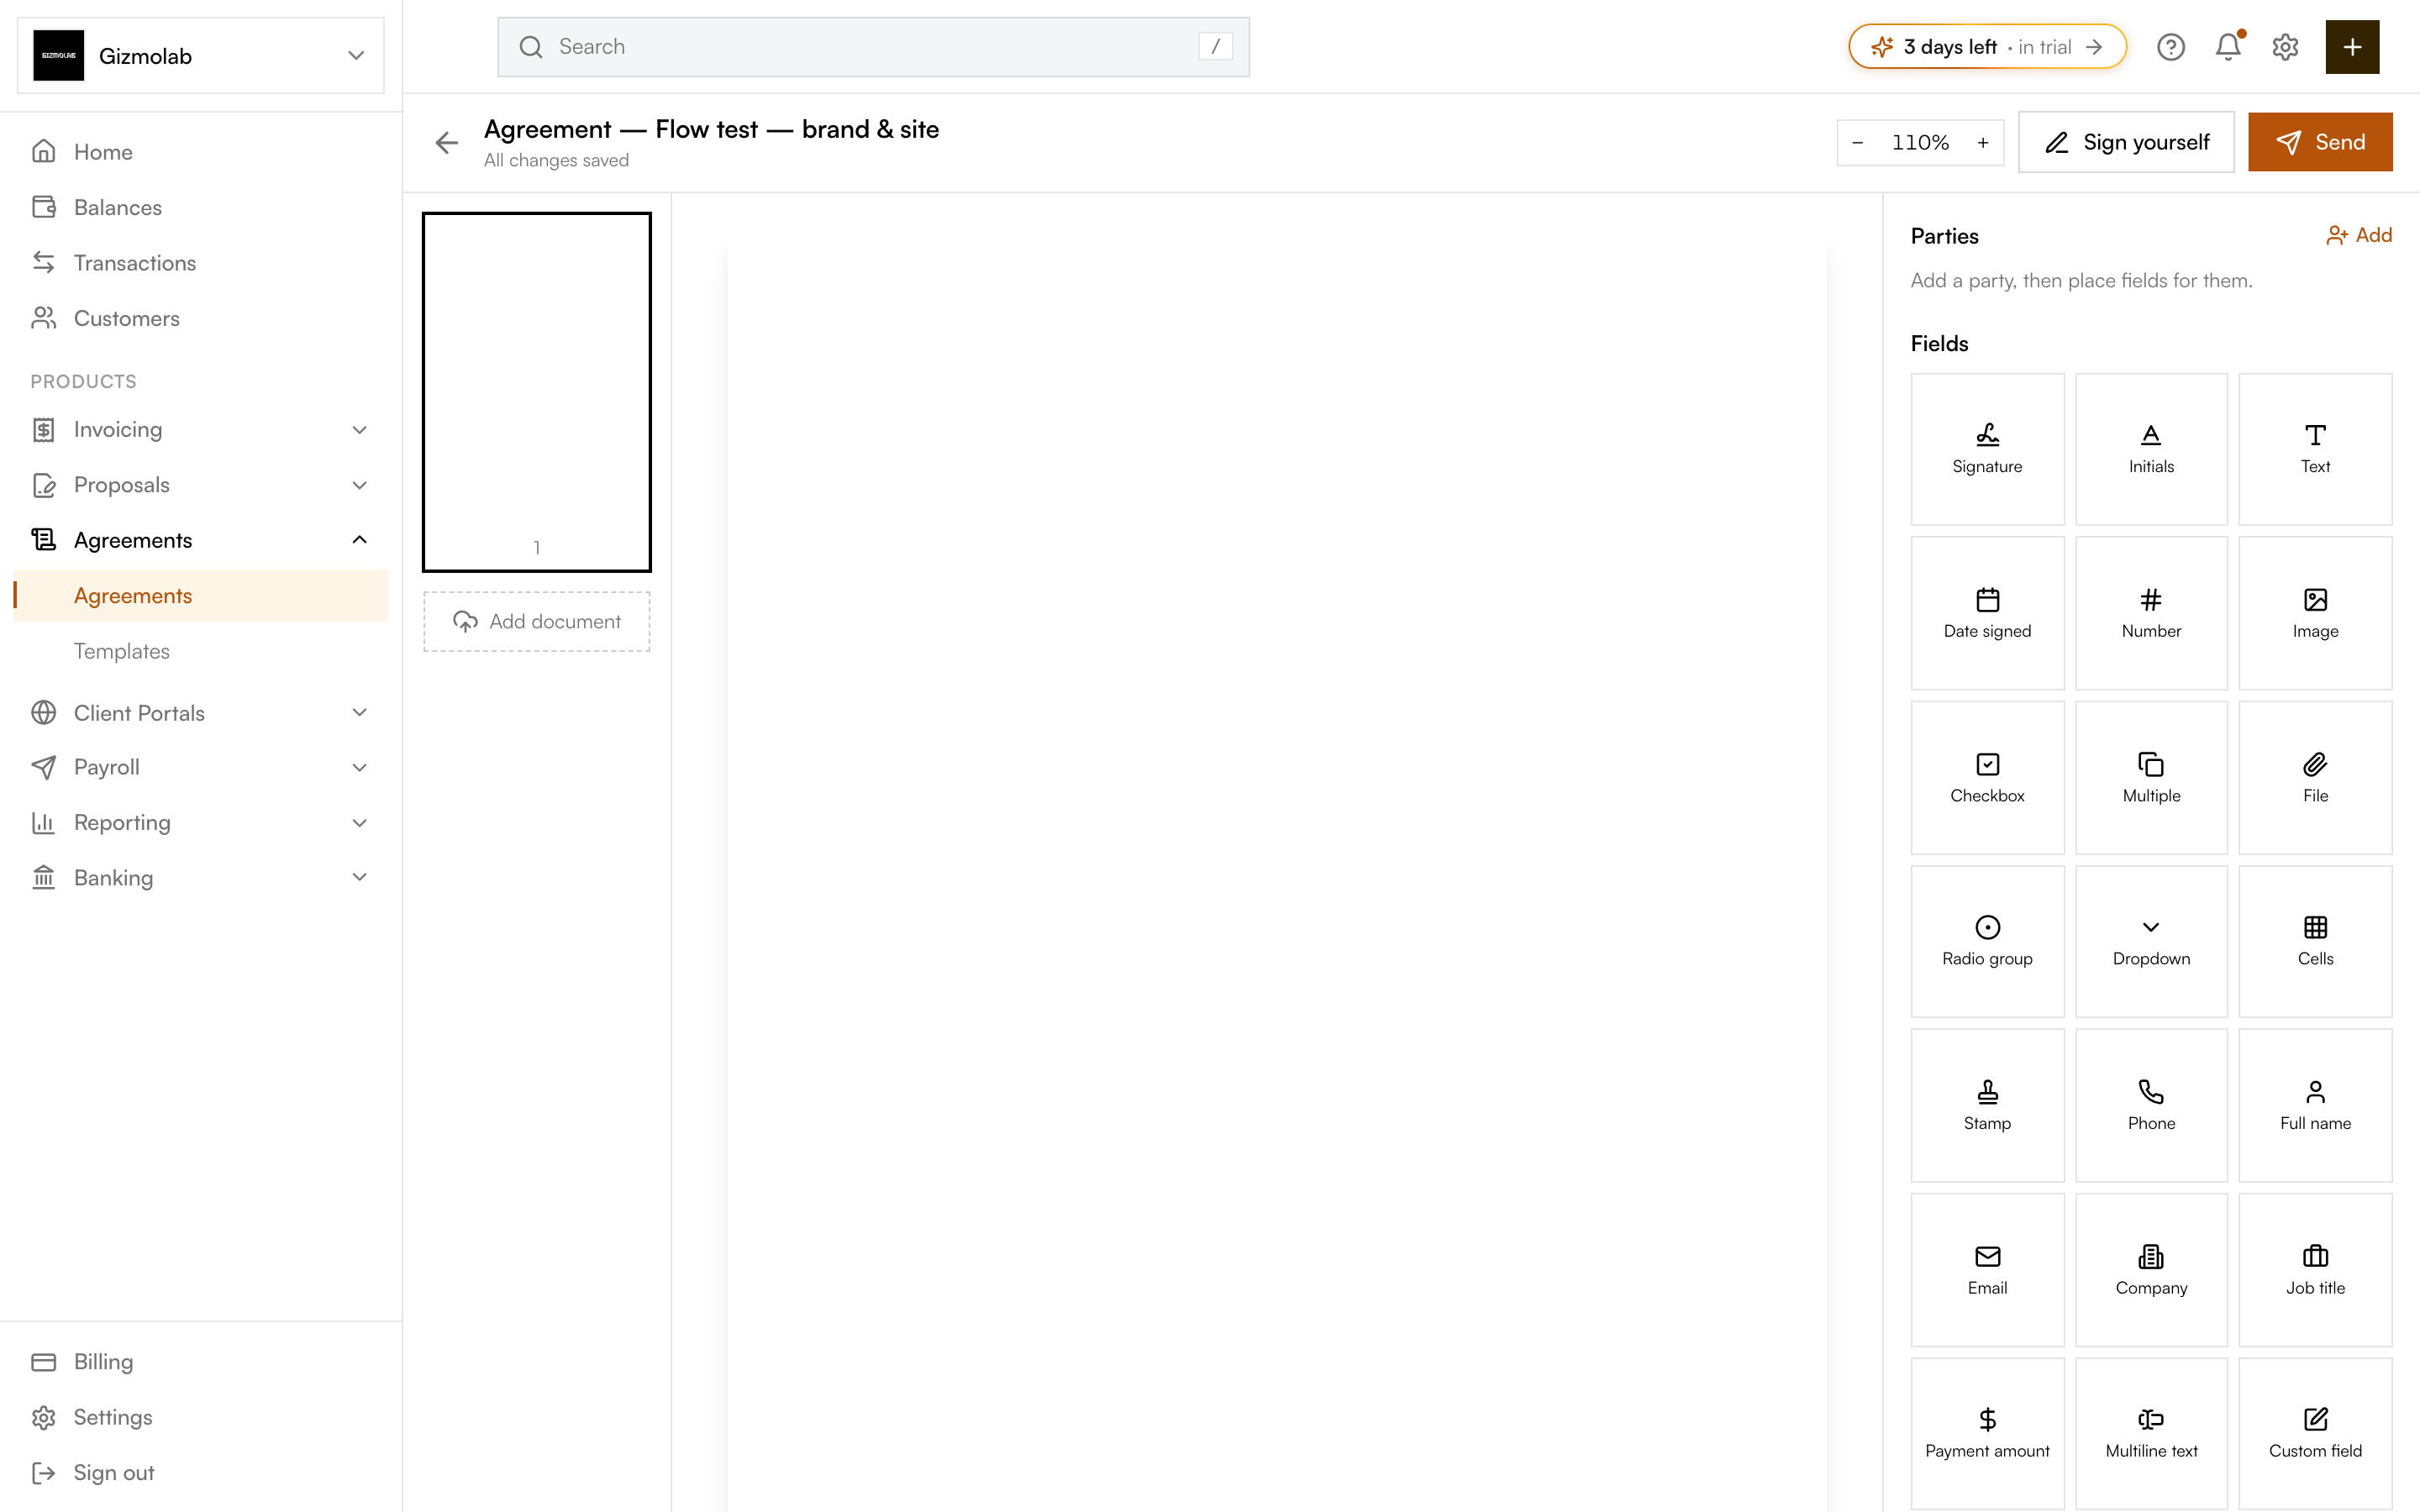
- 1Send for signature when ready
- 2Sign it yourself
- 3Add signers and parties
- 4Drag field types onto the page
- 5Document signing canvas
- 6Upload or add documents
Add the document#
If no document exists yet, the canvas shows an upload zone:
- Choose file — Upload a PDF, or drag and drop one onto the zone. Only PDF files are supported.
- Generate from text — Build the document from the template text or the agreement text instead.
Use the left panel to see page thumbnails and Add document to bring in more pages. The zoom control in the top bar adjusts the canvas scale.
Add signers (parties)#
In the Parties panel on the right, click Add to create a signer. Each party has:
- Role — e.g. "First party", "Second party".
- Full name and email — Where the signing invitation is sent.
- Verification — Optional extra check to open the document: no extra verification, an email OTP, or an access code the sender shares.
When you have more than one party, you can turn on Sign in order (sequential) so signers are routed one after another instead of all at once.
Tip
Select a party first, then place fields—new signer fields are assigned to the active party. Dropping a signature field before any party exists creates a first party automatically.
Place fields#
The Fields palette lists every field type. To place one:
- Drag a field from the palette onto the document, or
- Click a field to arm it, then draw a box on the page (Esc to cancel).
Drag a field to move it, drag its corner handle to resize, and use Delete or Backspace to remove the selected field. Selecting a field opens its settings, where you can change the assigned party, set a label, edit options (for dropdowns and radio groups), and toggle required.
Field types#
- Signature and Initials — Drawn or typed signatures.
- Date signed — Auto-filled with the signing date.
- Text, Number, Multiline text, Custom field — Free-form entry.
- Checkbox, Dropdown, Radio group — Choices and confirmations.
- Full name, Email, Company, Job title — Auto-filled from the signer.
- Payment amount — A currency value.
- Image, Stamp, File — Uploaded images or attachments (up to 5MB each).
- Phone — A phone number.
- Cells — A comb field for one character per box, e.g. IDs or codes.
Changes save automatically—the top bar shows "All changes saved", "Saving…", or "Unsaved changes".
Send or sign yourself#
- Send — Sends the agreement to your signers and moves it to out for signature. The button respects the parallel or sequential routing you chose.
- Sign yourself — Opens the signing ceremony for you to complete your own fields immediately.
If anything is missing (for example a required field with no assigned signer), a banner lists what needs fixing before you can send.
The signing ceremony#
Each signer opens a secure link and:
- Verifies their identity if you required an email OTP or access code.
- Fills their fields—signing, initialing, typing, checking boxes, or uploading images and files. A "Next field" button jumps to the next required item.
- Agrees to the consent statement and clicks Finish signing.
Signers can also Decline, optionally giving a reason, which notifies the sender. Each signer sees only their own fields as active; other signers' fields appear dimmed.
Completed document#
When everyone has signed, the agreement is completed:
- The fields are flattened into a signed PDF, which signers can download and which is emailed to them.
- A certificate of completion and an audit trail record who signed, when, and from which IP address.
On the agreement detail page you can review the Signatures list (signer, party, and signature type) and the Activity timeline (created, sent, viewed, signed, voided, and more).
Note
Completed and voided agreements are read-only—the editor redirects to the detail page so a signed record cannot be changed.