Creating Proposals#
Start a proposal from a brief, pick a design, and Hanko builds a branded proposal you can refine and send.
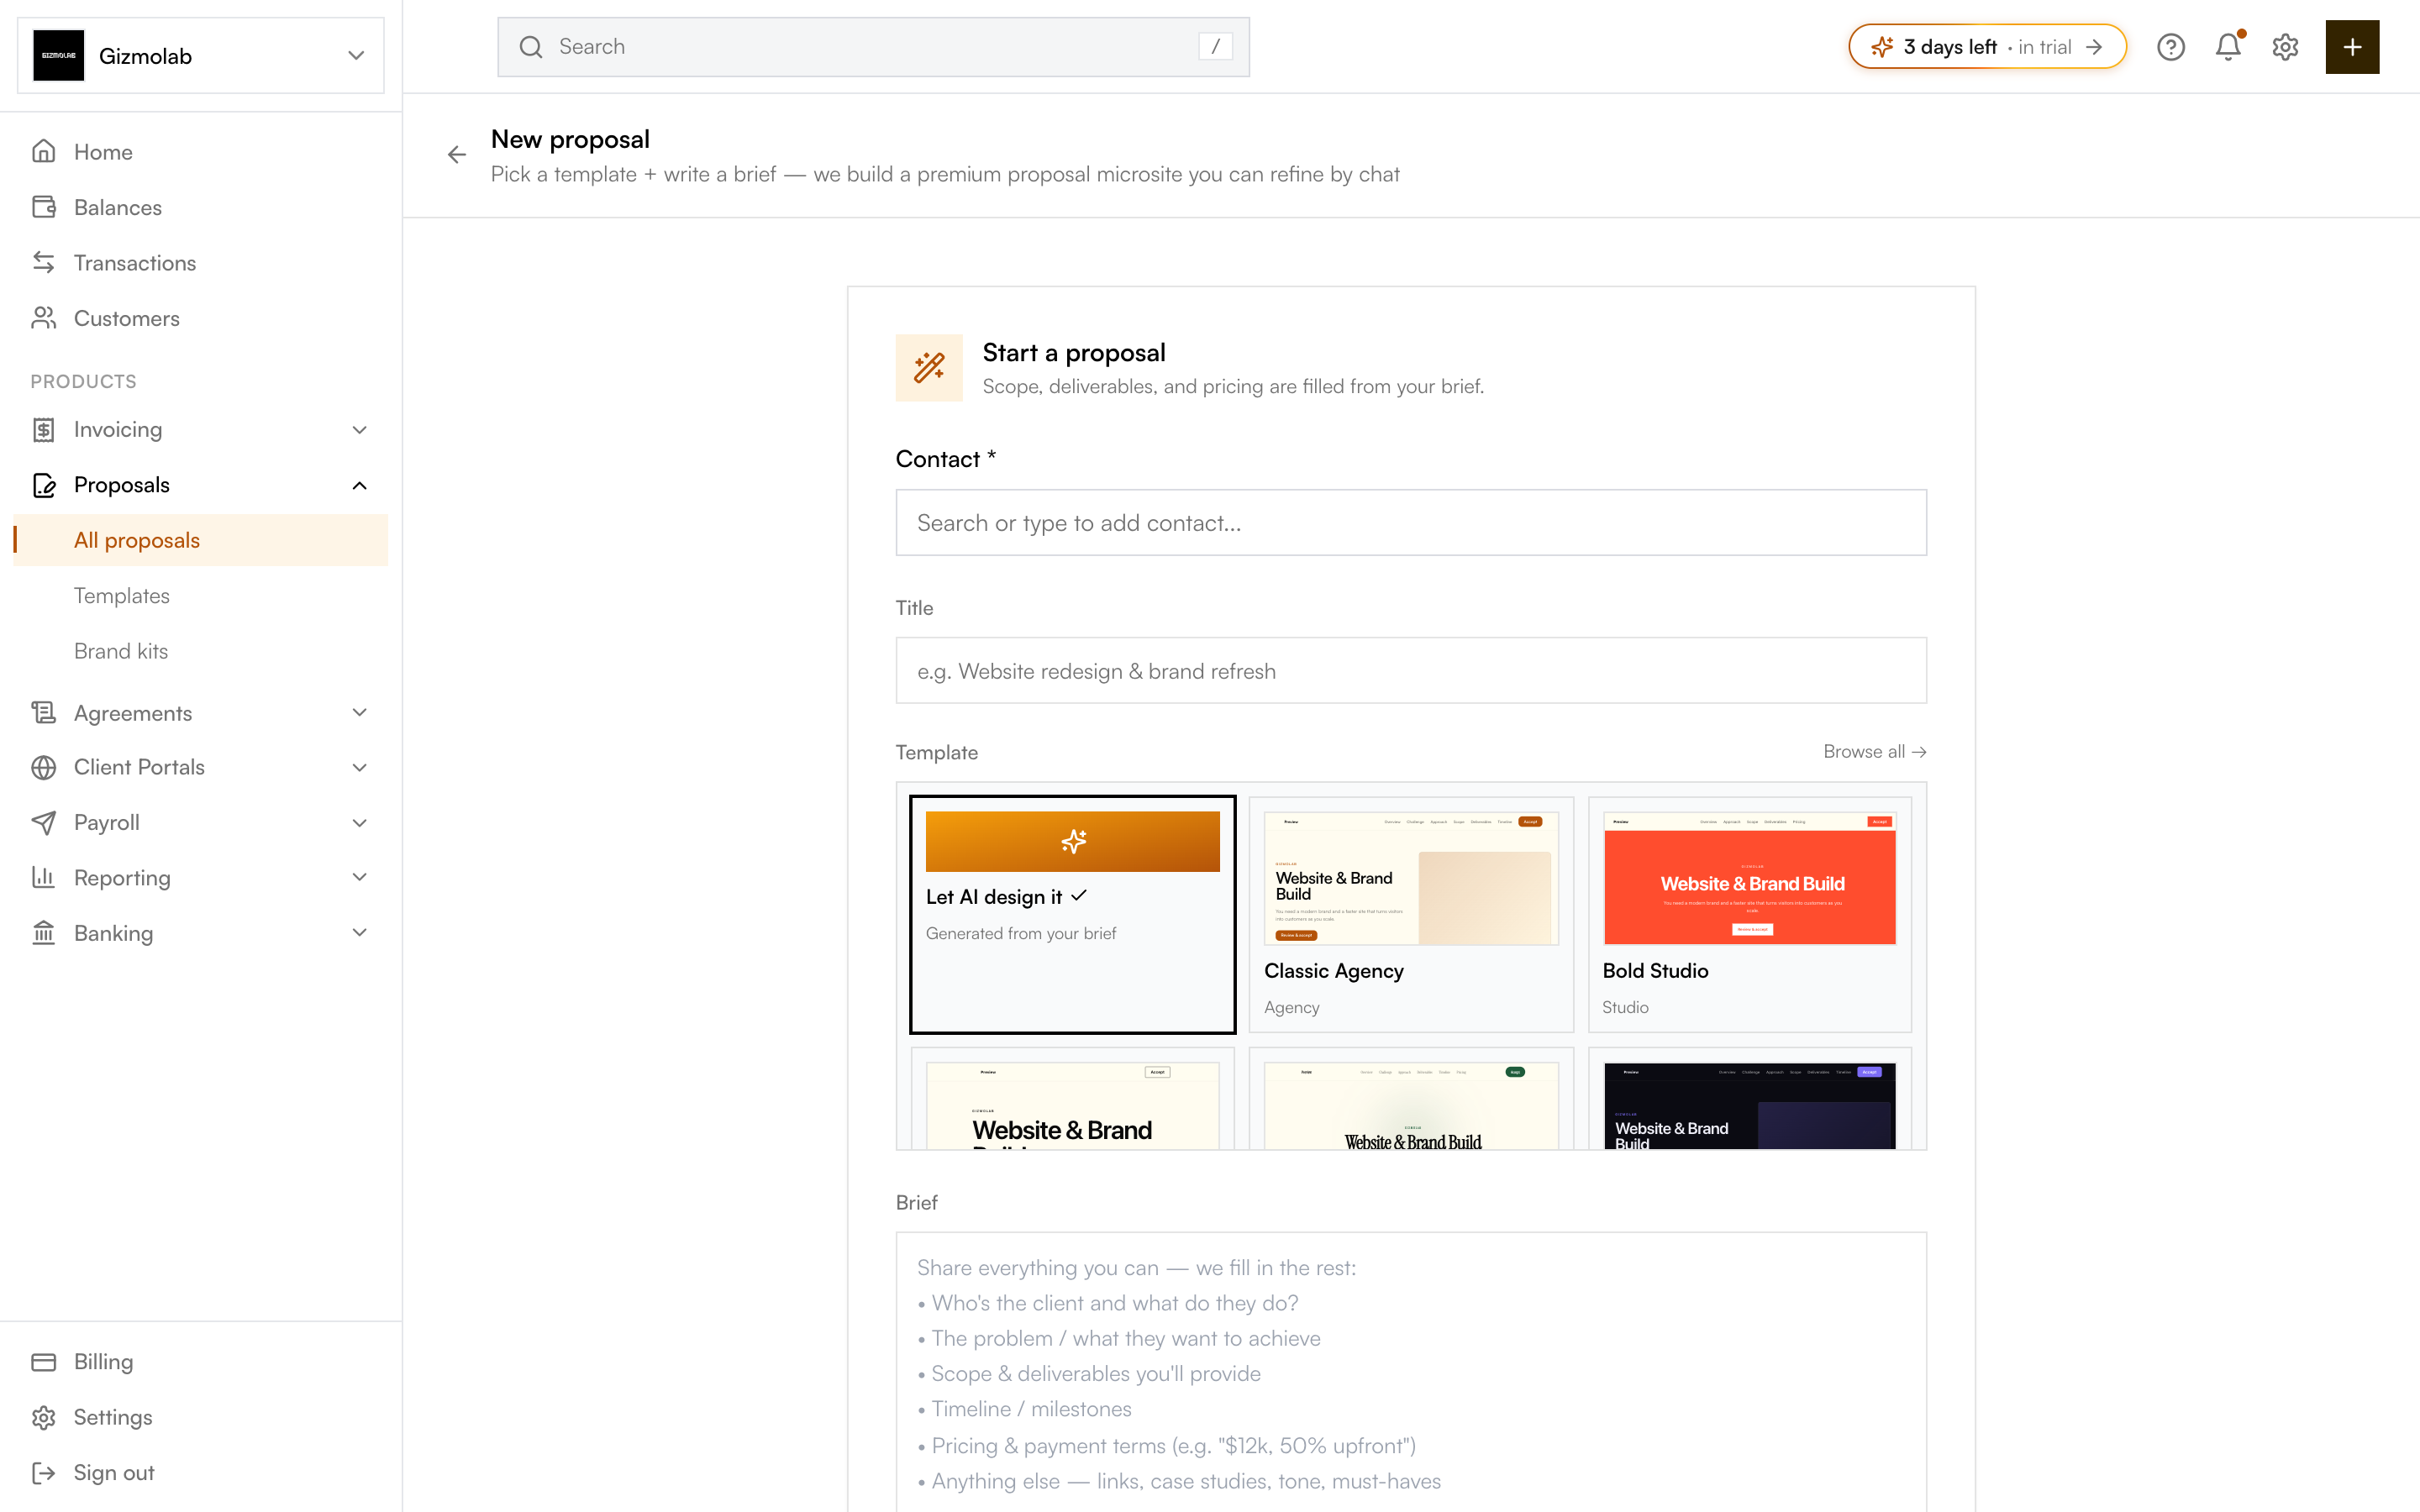
- 1Pick the client contact
- 2Name the proposal
- 3Pick a template or AI
- 4Describe the work in the brief
Start a proposal#
Click New proposal from the proposals list, then fill in:
- Contact — The client this proposal is for. Search existing contacts or add one inline.
- Title — A short name for the proposal, e.g. "Website redesign & brand refresh".
- Template — Choose Let AI design it to generate from your brief, or pick a ready-made design. See Templates.
- Brief — Describe the client, the problem, scope and deliverables, timeline, and pricing. The more you share, the better the result.
Note
Scope, deliverables, and pricing are filled from your brief. If AI is not configured, pick a template to build instantly without it.
Click Generate with AI (or Create proposal when using a template) and Hanko builds the proposal, opening it in the studio to refine.
The proposal detail page#
Once created, the detail page is where you manage everything about the proposal.
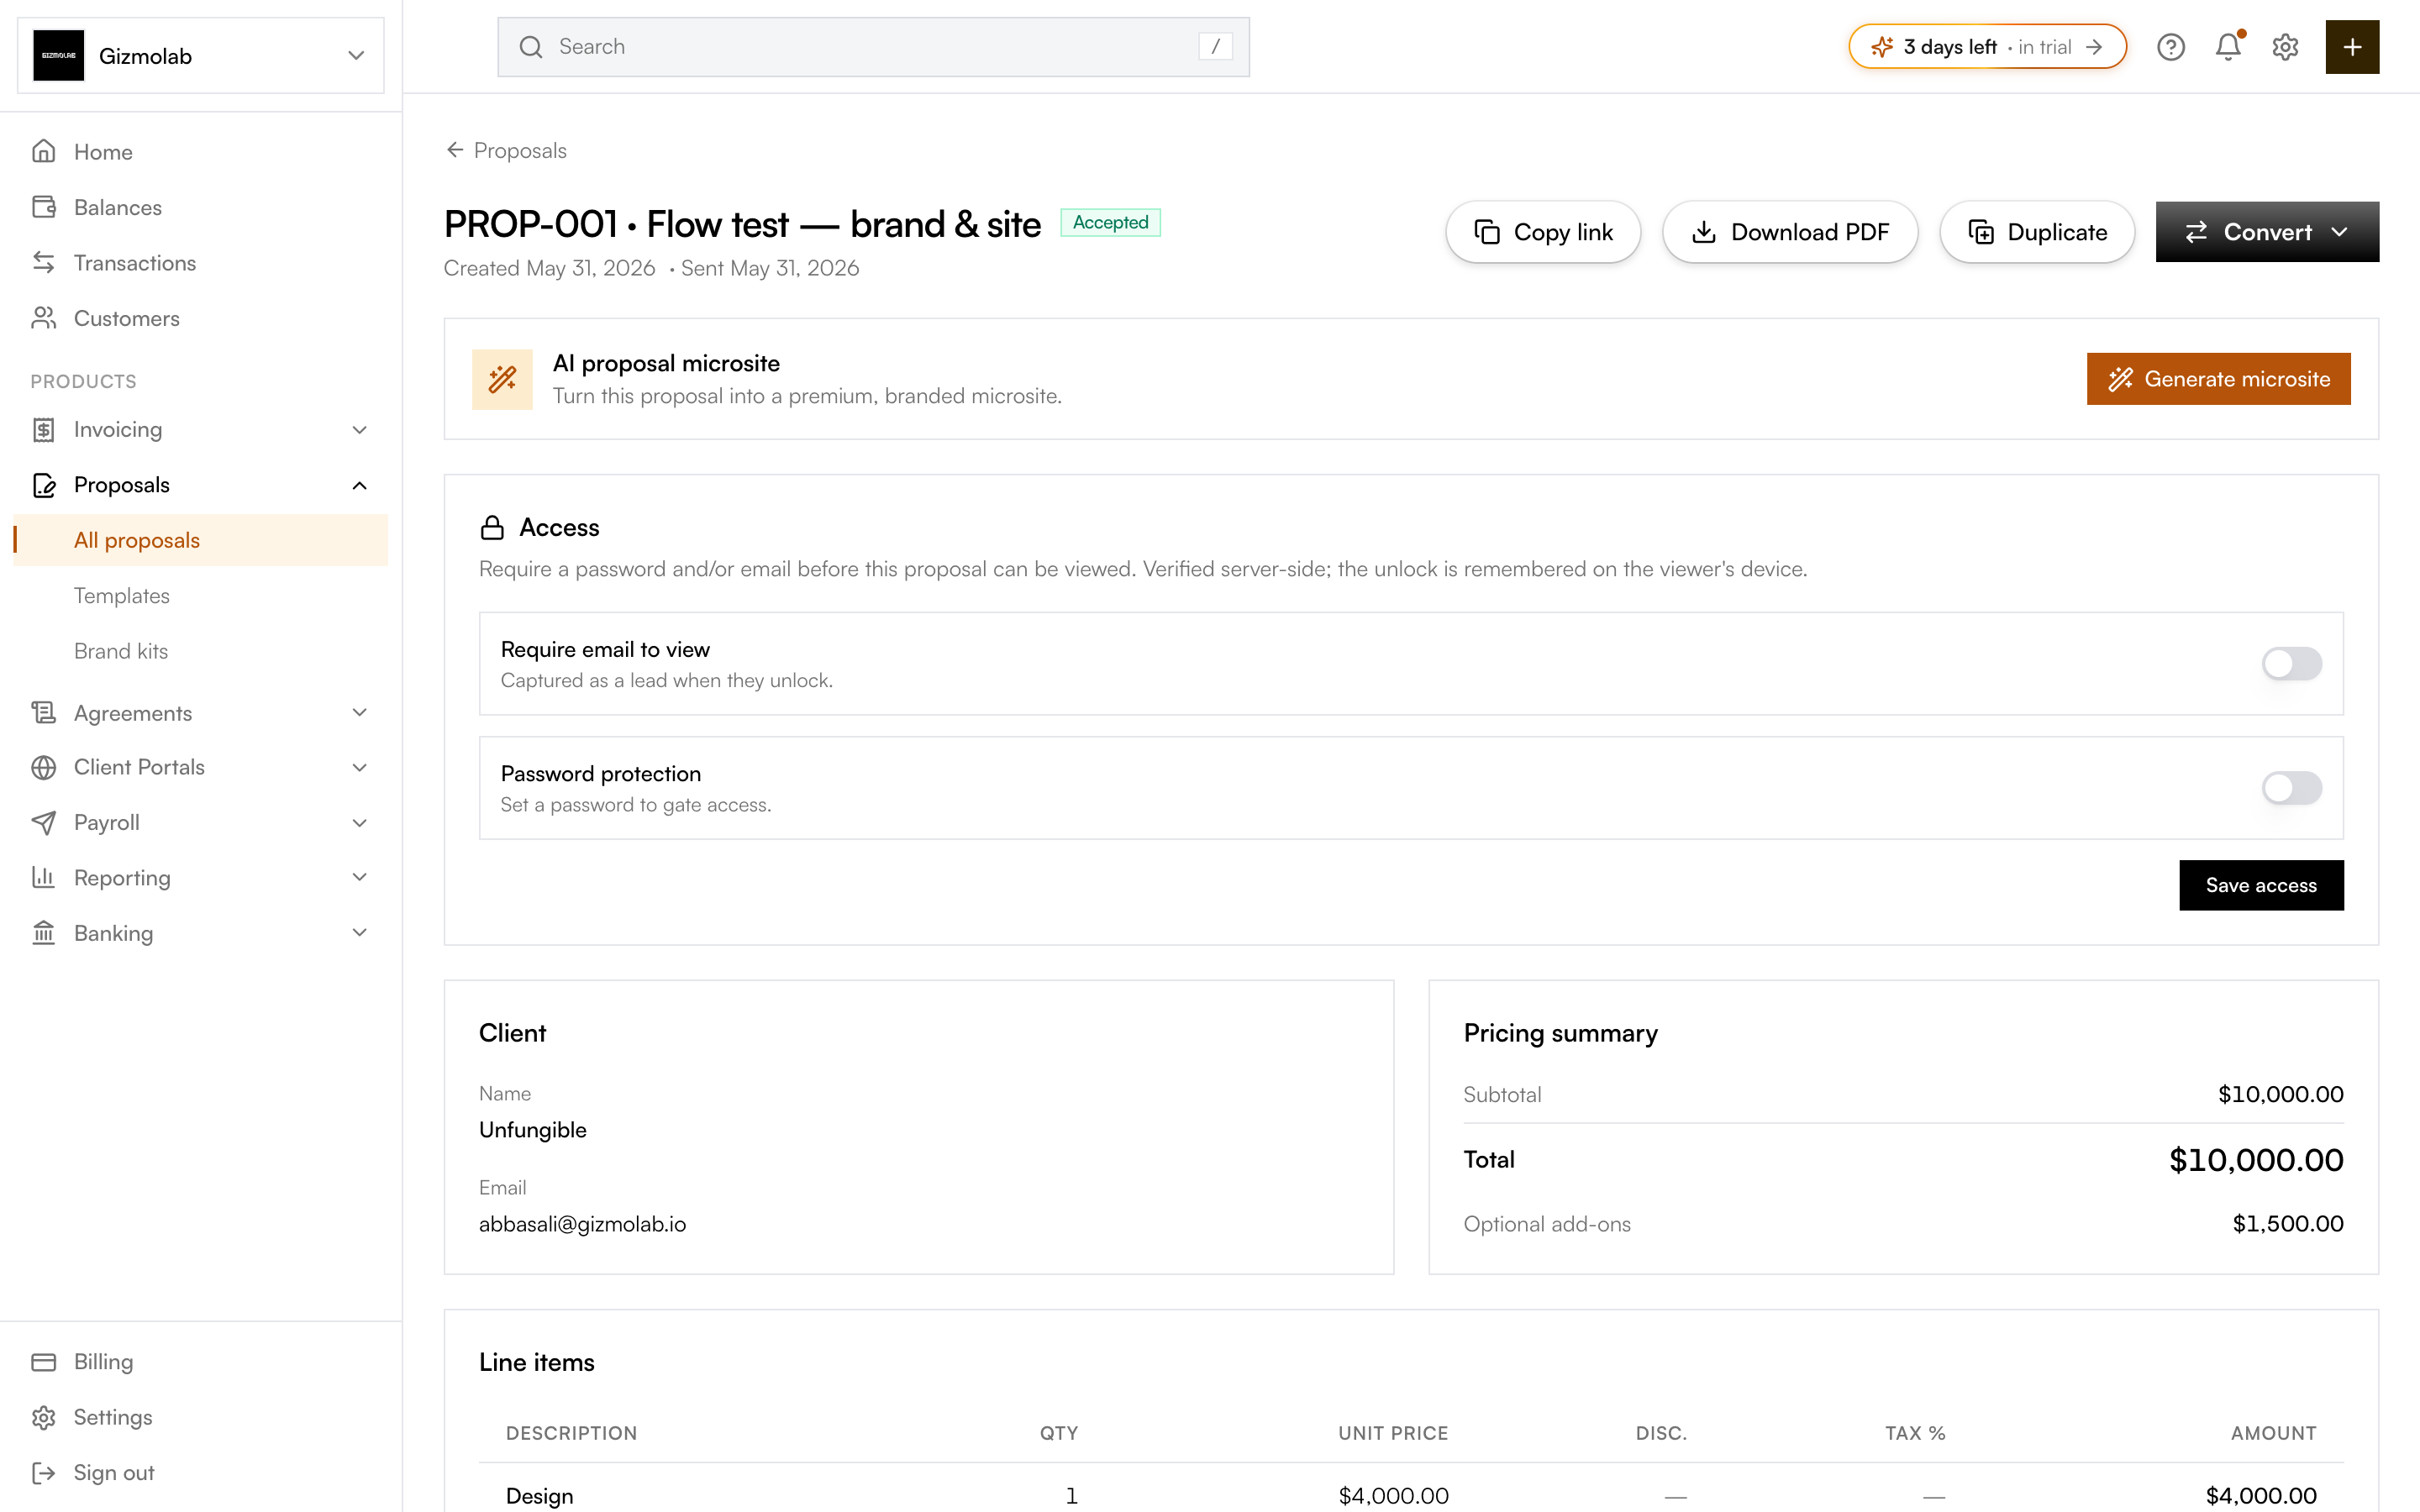
- 1Copy the client link
- 2Download proposal PDF
- 3Convert to agreement or invoice
- 4Build a branded microsite
- 5Gate with email or password
- 6Pricing summary and add-ons
From here you can:
- Copy link — Get the public link to share with the client.
- Download PDF — Save a PDF copy of the proposal.
- Duplicate — Reuse this proposal as the basis for a new one.
- Convert — Turn the proposal into an agreement or invoice.
- Generate microsite — Turn the proposal into a branded microsite.
The page also shows the client and pricing summary, line items (including optional add-ons), any payment schedule, a billing breakdown with linked invoices, the proposal content sections, and an activity timeline.
Control who can view it#
Use the Access card to gate the proposal:
- Require email to view — Visitors enter an email before viewing; captured as a lead.
- Password protection — Set a password the client must enter.
Click Save access to apply.
What the client sees#
When you share the link, the client opens a clean, branded page with your scope, deliverables, pricing, and any optional add-ons. They can review and accept (or reject) right on the page. Acceptance records their name, email, time, and IP on the detail page.