Customizing a Portal#
Every client portal can be tailored to that client. From Client Portals → Overview, click a client’s name or Customize to open their Client workspace. The Setup tab is where you configure the portal; the Pages, Calendar, Approvals, and Requests tabs add extra content for that client.
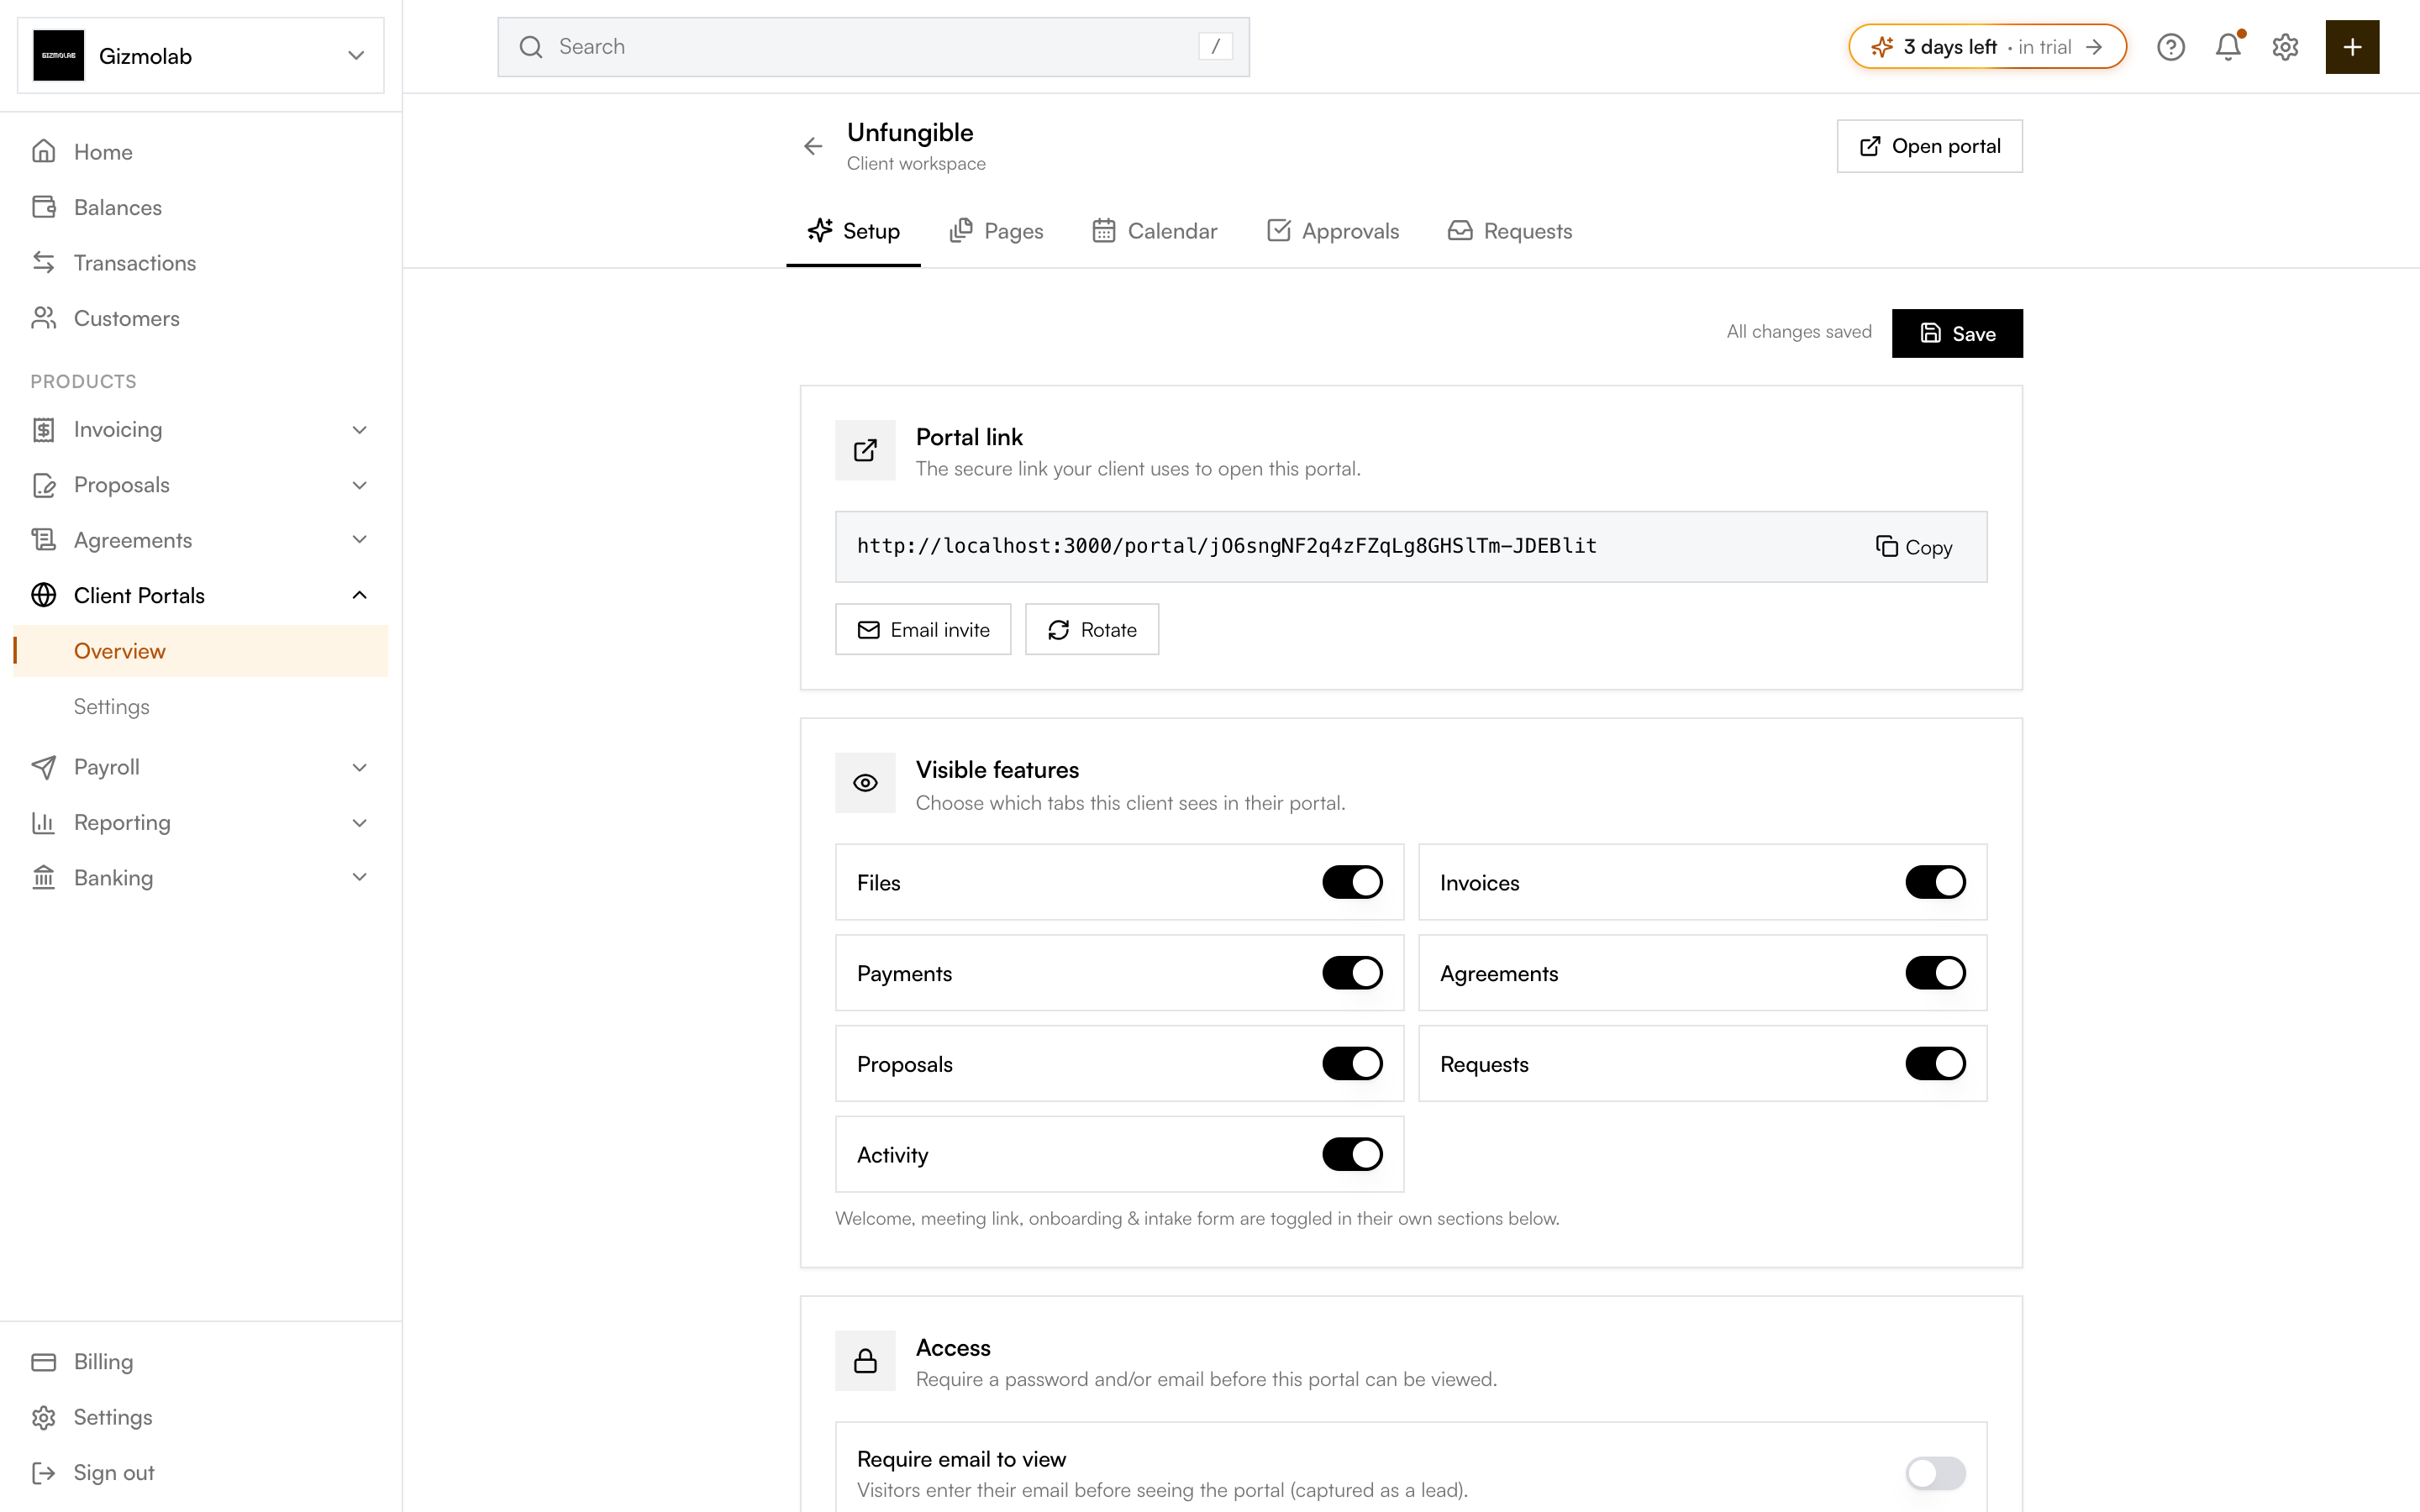
- 1Setup and workspace tabs
- 2Save your portal changes
- 3Secure link the client opens
- 4Toggle which sections clients see
- 5Require email or password to view
Changes are saved when you click Save; the status line shows All changes saved or Unsaved changes.
Portal link#
The first card holds the secure link the client uses to open the portal. Create portal link generates it, then you can Copy it, Email invite the contact (requires an email on file), or Rotate it to invalidate the old link.
Visible features#
Toggle which tabs the client sees: Files, Invoices, Payments, Agreements, Proposals, Requests, and Activity. The welcome message, meeting link, onboarding, and intake form are toggled in their own sections below.
Access#
By default anyone with the link can view the portal. To add a gate:
- Require email to view — Visitors enter their email before seeing the portal; each entry is captured as a lead.
- Password protection — Set a password that must be entered to unlock the portal.
Note
Access is enforced on the server. Once a visitor unlocks the portal, the unlock is remembered on their device so they don’t re-enter it each time.
Welcome#
A greeting shown at the top of the portal. Set a Headline and a rich-text Message. Toggle the whole section on or off from its header.
Meeting link#
Surface a booking or scheduling link (Calendly, Google Meet, etc.). Set a Button label and the Link URL.
Onboarding material#
Getting-started guidance for the client. Add a Title, an Intro, and a list of Steps. Each step has a title, a short body, and an optional link with its own label.
Files#
Documents shared with this client and shown in their portal. Click or drag a file into the upload area to add it (max 3MB each). Uploaded files are listed below and can be removed.
Intake form#
A form the client fills out in the portal. Set a Form title and Description, then add Fields. Each field has a label, a type, and an optional required flag. Field types are:
- Short text
- Paragraph
- Phone
- Number
- Date
- Dropdown (one option per line)
- Checkbox
Submissions appear under the form so you can review the client’s answers.
Tip
Use the intake form to collect everything you need to start a project — brand assets, goals, logins — so the details live alongside the client’s invoices and agreements.
Org-wide portal settings#
Settings under Client Portals → Settings apply to every portal in your organization.
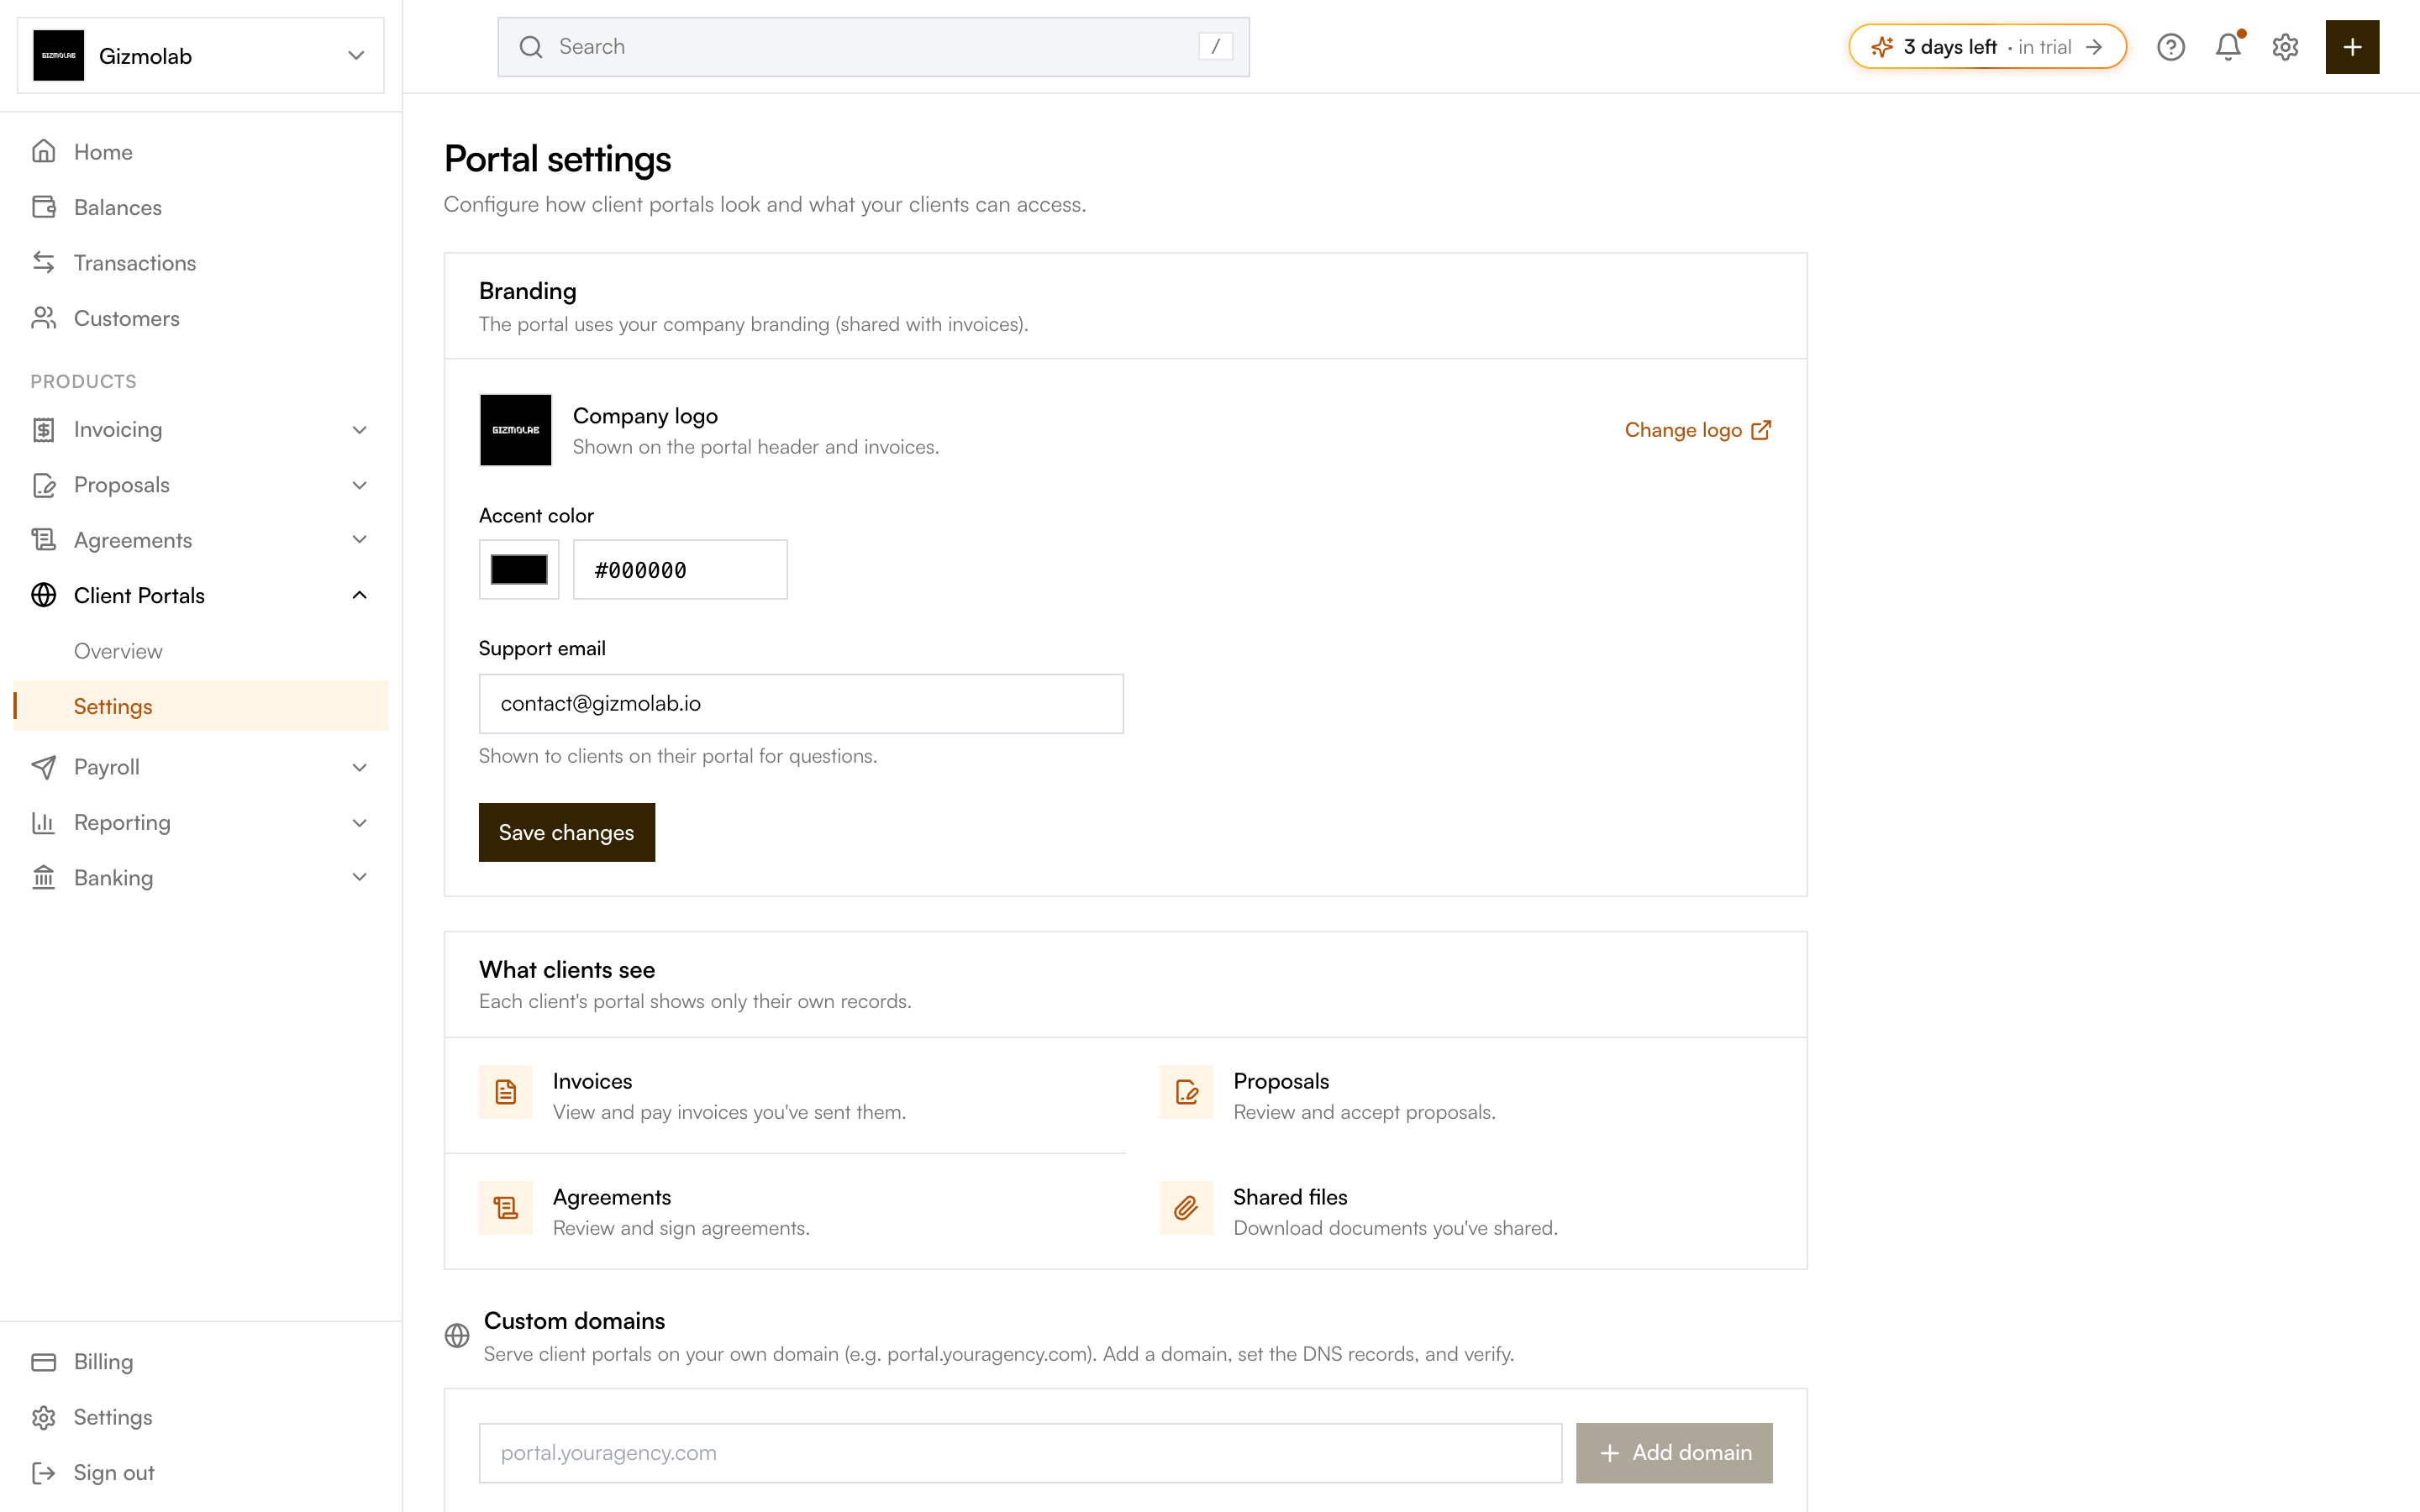
- 1Logo shown on portals and invoices
- 2Brand accent color for portals
- 3Records each portal can show
- 4Serve portals on your own domain
- Branding — Company logo, accent color, and a support email shown to clients. Branding is shared with invoices.
- What clients see — A reminder that each portal shows only that client’s own invoices, proposals, agreements, and shared files.
- Custom domains — Serve portals on your own domain (e.g. portal.youragency.com). Add a domain, set the DNS records, and verify it.