Quick Start#
This guide takes you from sign-up to sending your first invoice.
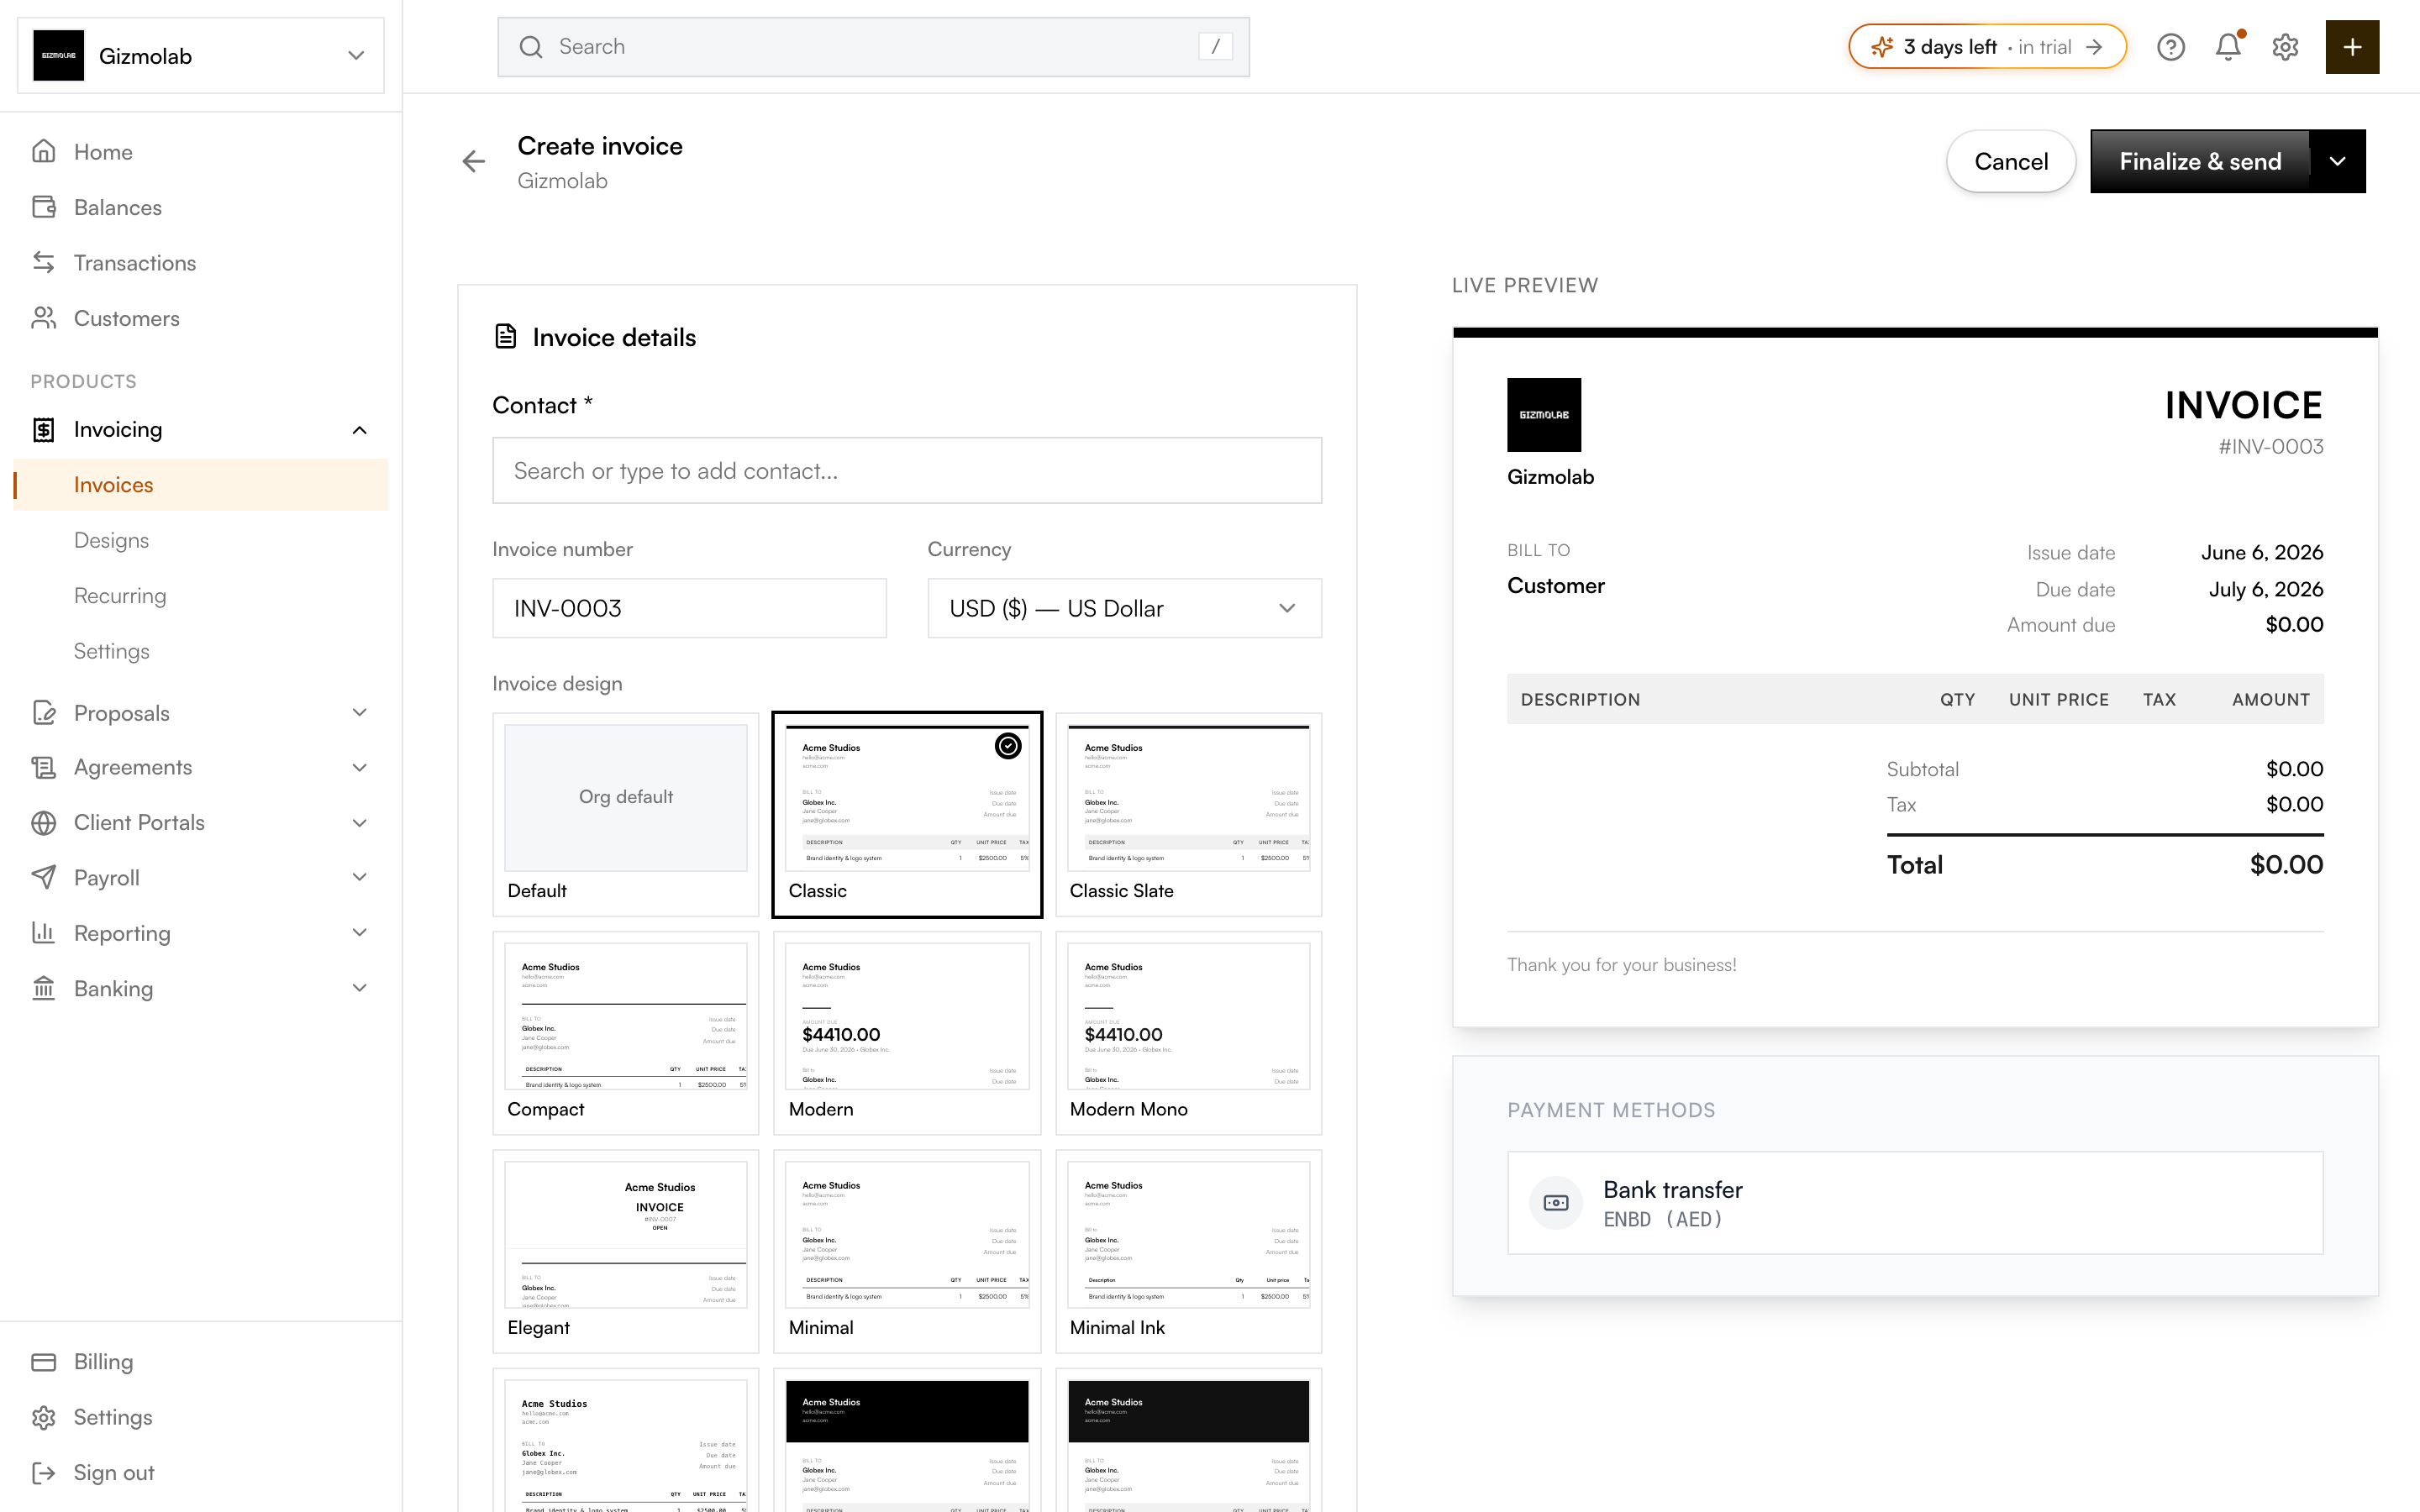
- 1Pick who you are billing
- 2Set number and currency
- 3Choose an invoice design
- 4Live preview updates as you type
- 5Save and send in one step
Create an account#
Open the Hanko app and connect your wallet. You will complete a short onboarding questionnaire — choose Individual or Business, then answer a few quick questions (you can skip any).
Hanko has no free plan, so pick one under Settings → Billing & plan. Individuals can start on Starter; Pro includes a 3-day trial. See Billing & Plans.
New users create an organization (your company or project). If you already have one, pick it from the org switcher in the sidebar.
Create your first invoice#
Go to Invoicing → Invoices and click Create invoice. Select the contact, set the invoice number and currency, choose an invoice design, and add at least one line item (description, quantity, price). The live preview reflects your choices.
Add one or more payment methods — Flex Routes (fiat and crypto via Bridge.xyz), bank accounts, or a custom wallet address. A single invoice can offer several at once. See Flex Routes.
Use Finalize & send to save and email the invoice to the contact in one step, or save it as a draft and send later from the invoice detail page.
Next steps
Explore Creating Invoices, set up Flex Routes, or review your numbers in Reports.