CSV Import#
Add many payout recipients at once by uploading a CSV file. The importer auto-detects the address and amount columns, plus an optional email column.
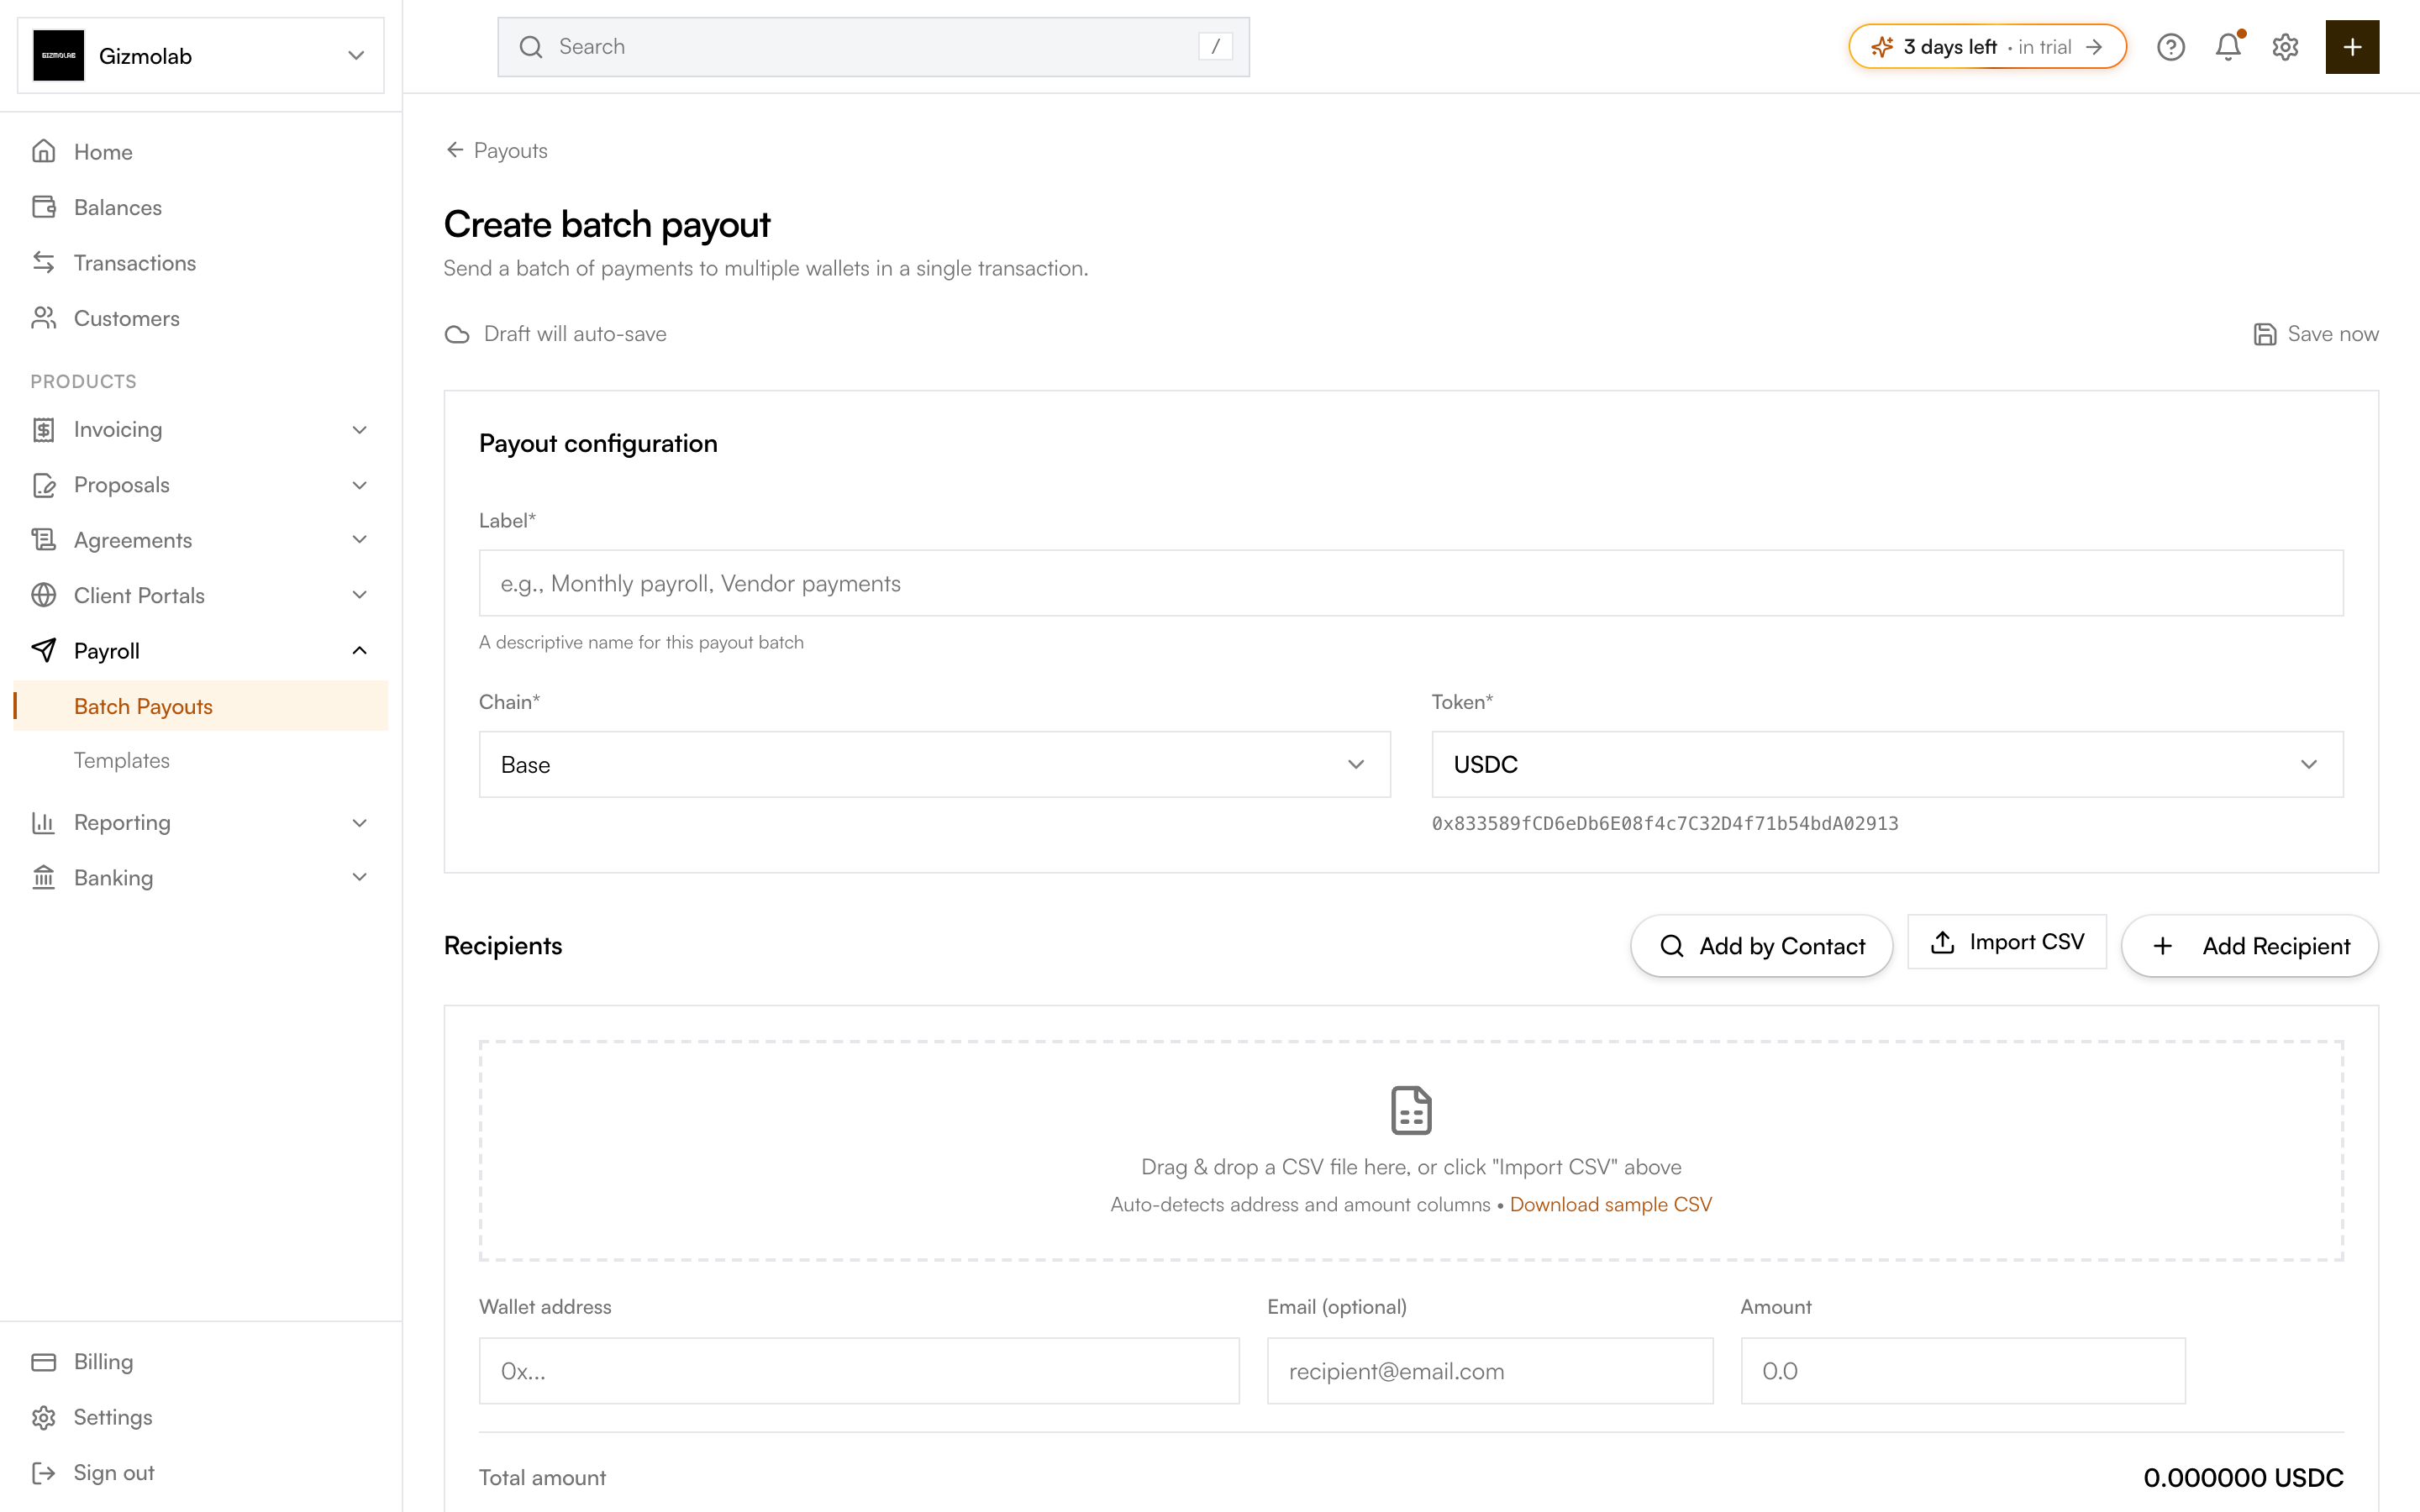
- 1Import CSV button
- 2Drag and drop a CSV here
- 3Download a sample CSV
Supported format#
Give your CSV a header row. The importer auto-detects:
- Address — EVM wallet address (0x...). Required.
- Amount — Numeric amount to send. Required.
- Email — Optional. Used to notify the recipient.
Rows with an invalid or missing address or amount are reported and skipped. Click Download sample CSV to get a correctly formatted starter file.
Warning
Addresses are validated as EVM addresses. After import, check the result banner for the number imported and any skipped rows, then fix them.
Import steps#
Create a file with a header row and one row per recipient. Example:
| address | amount | |
|---|---|---|
| 0x1234... | 100 | alice@example.com |
| 0x5678... | 250.50 | bob@example.com |
In the create-payout flow, click Import CSV and choose your file, or drag the file onto the drop zone in the Recipients section.
A banner reports how many recipients were imported and which columns were detected. Imported rows are appended to your existing recipients.
After import you can still add, edit, or remove rows and adjust amounts before executing. The same CSV import is available when building a template.